Discover how to recover emails that have been permanently deleted from an iPhone in the following paragraphs and learn how to avoid such a problem altogether.
Did you delete your important Emails from your iPhone and are now worried about how to retrieve deleted emails on your iPhone?
Don’t worry, just keep your composure. Because we are all human, we are the only ones who make mistakes. In actuality, pressing the delete button to delete unwanted data from the phone, such as an email from the Mail app, is far too simple.
However, by following the straightforward steps outlined below, you can easily recover deleted emails from your iPhone or iPad. You may be interested in What Does Flagging An Email Do?
How to Recover Deleted Emails on iPhone?
The best data recovery techniques are listed below if you need to retrieve deleted, lost, or missing emails from your iPhone.
Method #1: Undo Deletion
The most recent action you took on your iPhone can now be undone by shaking the device thanks to a cool feature. As soon as you realize you accidentally deleted the wrong email, you have the option to recover it right away from your iPhone, but only if that was the last action you took on it.
So, using this method, you just need to shake your iPhone to restore an email that was deleted. A pop-up window will then appear and ask you if you want to reverse the previous action. The email will be returned to its original location after you tap Undo.
Method #2: Check Trash Folder
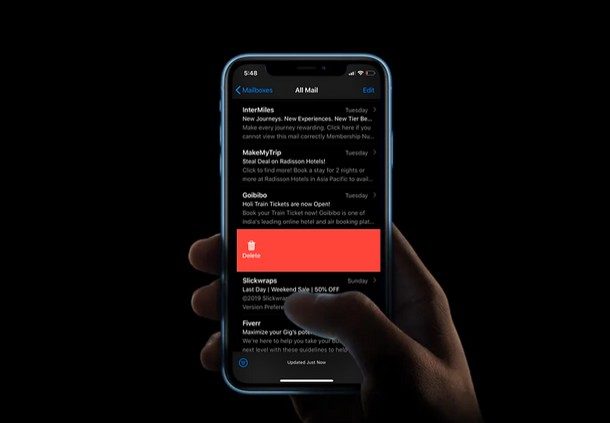
When you delete an email on an iPhone, it is immediately moved to the Trash folder in the Mail app. You should be able to recover deleted emails from the Trash folder and move them back to the folder where they were located prior to deletion if the Trash folder hasn’t been cleared out after you’ve deleted your email.
Follow these steps to find deleted emails on your iPhone and recover a deleted one from the Trash folder:
- Open the Mail app on your iPhone.
- Tap Trash or Bin from the sidebar menu on the left.
- Select the email you want to recover by tapping the Edit button in the top right corner of the screen.
- The folder to which you want to move the email is selected when you tap Move.

Method #3: Check the Archive
On your iPhone, it’s very simple to inadvertently move an email to the Archive folder rather than delete it. So it’s a good idea to check the Archive folder as well, even if you can’t find the email in the Trash folder.
Here’s how to find archived emails on your iPhone and recover the email from there:
- Open the Mail app on your iPhone.
- Navigate to the Mailboxes screen to view all the folders.
- Select the required email address, then select All Mail.
- You can view all emails associated with that account, even ones you’ve archived.
- To retrieve an email, open it and tap the folder icon.
- Decide which folder you want to move the chosen email to.
Method #4: Recover from iCloud Backup
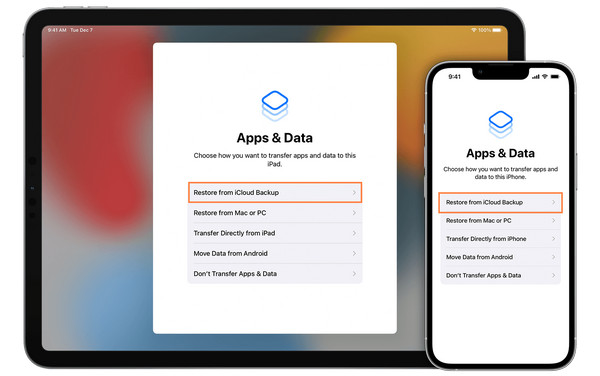
Restoring deleted emails on iPhones using this data recovery technique is effective. However, you can’t recover only emails from your iCloud backup. To restore everything from an iCloud backup, you must first wipe clean your iPhone of all data and settings. Then, when configuring your phone once more.
Follow these steps to retrieve deleted emails on your iPhone using an iCloud backup:
- On your iPhone, launch the Settings app.
- Erase all content and settings by going to General > Transfer or Reset iPhone. You will have a clean iPhone after the procedure is complete.
- To set up your phone, follow the onscreen directions.
- To restore all of your files after seeing the Apps and Data screen, select Restore from iCloud Backup.
- To access the backups, sign in with your iCloud credentials.
- Select a reliable backup version and wait for the operation to be completed.
Method #5: Restore Emails from Your iCloud Account
You can attempt to restore the missing email from a recent backup if you’ve been backing up your emails to your iCloud account. Due to the settings you’ve made on your phone regarding iCloud backups, it is not always possible to recover permanently deleted emails from your iPhone using this method.
Due to the fact that you can access all of your emails through your iCloud account, this method is a great choice if you want to recover old emails on your iPhone.
Follow these steps to recover accidentally deleted emails on your iPhone from your iCloud account:
- Go to icloud.com on your iPhone’s browser.
- Using your Apple ID and password, access your iCloud account.
- Tap the Mail icon.
- Select the emails you want to recover from the trash by going to the Trash tab.
- Select the folder to which you want to move the selected emails by tapping Move.
Method #6: Use Data Recovery Software
A data recovery program like Disk Drill can help you recover deleted or lost emails if you’ve been using the Mail app on both your iPhone and Mac to access your email account. Because it can recover emlx files (which are archives of your emails) and is compatible with practically every MacBook version, this tool was our top choice. For recovering deleted emails directly from a Mac, there are a few more options as well.
Follow these steps to recover emails from your iPhone using a data recovery tool:
- Installing Disk Drill on your computer is as simple as downloading it and following the onscreen instructions.
- The primary drive of your Mac should be selected under the Storage devices tab in the sidebar.
- To start the scan, click the “Search for lost data” button.
- After the scan is complete, click Review found items to browse the files that were found.
- Either manually search for the email files, or type emlx in the search field at the top-right corner of the screen to filter out the scan results.
- Select the needed files and click the Recover button.
- For the recovered data’s preferred location, select it and then click OK to confirm.
This video can also help you learn how to recover permanently deleted emails on your iPhone
How to Protect Your Emails?
Despite the fact that email accounts are frequently quite secure, accidental deletion may be the main cause of lost emails. Users frequently experience inbox overflow because email accounts are used for the majority of daily communication.
Users occasionally delete or send important emails to the trash folder while trying to separate important emails from spam or irrelevant messages.
Although there are ways to recover deleted emails from the trash folder, you can use specific procedures to avoid this issue. The best way to protect your emails is to archive them rather than delete them.
The data in your emails can be saved and protected in a methodical way through archiving, which enables quick retrieval. Therefore, when you archive emails, they are placed in a separate folder without the risk of being permanently deleted.
Where Do Permanently Deleted Emails Go?
In most cases, emails that have been permanently deleted are recycled or destroyed. As if they had been sent through the email system the first time, recycled emails are delivered to the same recipients.
The email is placed in their “Inbox” and looks like any other email. The term “destruction” refers to the complete deletion of all data related to the email, including any mention of who received it when, and to who it was sent.
Do Deleted Emails Go Away Forever?
Although they might not always be entirely gone, deleted emails can be embarrassing and frustrating. Deleted emails typically disappear permanently from the server after a predetermined amount of time.
An email might still be recoverable in some situations, though. The email might still be accessible if someone has access to your account or if it was sent using a third-party service.
Additionally, after an email has been deleted, some email providers keep copies of it for a predetermined amount of time. This time frame might occasionally be six months long.
Conclusion: Think Twice before Deleting Any Data
Recovering deleted emails isn’t difficult. In the event of a mistaken deletion or message loss, this article offers a list of options for recovering your important emails.
So that you can handle a data loss situation without issues, keep in mind to back up all of your important data and files in a secure location.

